


Mechanical Seal Installation: Step-by-Step Best Practices
Mechanical Seal Installation: Step-by-Step Best Practices
Why correct mechanical seal installation matters for reliability and cost
Correct mechanical seal installation is one of the single most important actions maintenance and engineering teams can take to maximize equipment uptime, reduce leakage and lower lifecycle costs. A properly installed mechanical seal ensures correct face alignment, appropriate compression, and secure retention — preventing premature wear, vibration-related failures, and environmental or safety incidents from process fluid leaks. This guide focuses on practical, step-by-step best practices for installing mechanical seals, designed for technicians, engineers and purchasing teams who search for “mechanical seal” solutions with a : to buy, specify or service seals reliably.
Pre-installation planning and inspection for mechanical seal success
Before installation begins, invest time in planning. Identify the mechanical seal type (single, double, balanced, cartridge), material (e.g. carbon/ceramic/PTFE vs. elastomer types) and operating conditions (pressure, temperature, shaft speed, fluid chemistry). Inspect receiving components: shaft/ sleeve, gland, and seal faces for wear, grooves, corrosion or burrs. Measure shaft runout and diameter against seal manufacturer tolerances. Confirm you have the correct mechanical seal part number and all ancillary items (O-rings, set screws, backup rings, drive keys) to avoid on-site substitutions that create failure risks.
Checklist before you start mechanical seal installation
Use a standardized checklist. Key items include: correct seal model and material, shaft/sleeve within tolerance, clean environment available, calibrated torque wrench, correct lubricants (manufacturer-approved), new O-rings/back-up rings, and documentation of pre-installation measurements (shaft diameter, runout, face parallelism). If the pump uses a cartridge seal, check cartridge condition and ensure compatibility with the equipment.
Tools, consumables and workspace setup for mechanical seal work
Successful mechanical seal installation starts with the right tools and workspace. Prepare a clean, well-lit area free of dust and contaminants. Use the following essentials: torque wrench, feeler gauges, micrometer or caliper, dial indicator (for runout), soft-jawed vice or protective sleeves, assembly grease approved by the seal maker, solvent for cleaning, lint-free wipes, and calibrated measuring tools. For cartridge seals, ensure you have the correct gland stud pattern and torque sequence diagram from the equipment manufacturer.
Recommended consumables and safety items
Keep on hand replacement O-rings, backup rings (PTFE or elastomer), light assembly grease, thread locker if specified, protective gloves, eye protection, and lockout/tagout materials. Use only lubricants and thread compounds compatible with process fluids and seal materials to avoid chemical attack on elastomers or PTFE components.
Step-by-step mechanical seal installation procedure
The following step-by-step procedure outlines common best practices. Always cross-check with the seal manufacturer’s instructions and the equipment manual — they override general guidance for specific designs.
1) Lockout and safe isolation
Isolate equipment from power and process fluids, drain and vent the system, and apply lockout/tagout. Confirm zero energy before proceeding. Verify that the pump or rotating equipment cannot accidentally start.
2) Disassemble and remove the old mechanical seal
Carefully dismantle the seal assembly using soft tools to avoid nicking the shaft or sleeve. Retain any drive keys or locating rings if reusable and undamaged. Inspect removed parts for signs of unusual wear or failure mode (thermal damage, face scratching, elastomer extrusion) and photograph or document the condition — this helps diagnose root causes if failure recurs.
3) Clean and inspect shaft/sleeve and gland
Clean the shaft or sleeve with a compatible solvent and lint-free cloth. Remove rust, nicks, and burrs with fine abrasive or polishing stone only if permitted by the seal manufacturer; sometimes replacement of a damaged sleeve is the correct action. Measure shaft diameter, keyway condition and runout with a dial indicator. Typical acceptable total indicator runout (TIR) varies by seal type — consult the seal and equipment specifications.
4) Prepare the new mechanical seal components
Handle seal faces and ceramic/graphite components by their outer diameters; never touch lapped faces with bare hands. Verify mating faces match specification (rotation-facing stationary vs rotating orientation). Lightly lubricate O-rings and sliding surfaces with manufacturer-approved assembly grease to prevent rolling or pinching during installation. Check orientation of springs and drive mechanisms; incorrectly oriented springs are a common cause of early failure.
5) Install the stationary and rotating elements
Install the stationary seat into the gland recess carefully, ensuring it is fully seated and square. For seals that use an elastomer energizer, confirm correct compression per manufacturer guidance. Slide the rotating seal onto the shaft or sleeve, using a protective sleeve to avoid damaging the seal faces. If a sleeve is being used, secure it per specification and ensure set screws or drive keys are properly engaged and tightened to the recommended torque.
6) Set axial position and face engagement
Bring gland or cartridge into position to establish the correct axial compression. For many seals the face contact should be light with a small film of lubricant between faces; for other designs a defined axial offset (setting dimension) is required. Use feeler gauges or manufacturer fixtures to confirm recommended face spacing. Never force components into alignment — this can crack brittle components or deform elastomers.
7) Tighten gland bolts in correct sequence
Tighten gland bolts gradually in a star/ crisscross pattern to avoid distorting the stationary seat and face alignment. Use a calibrated torque wrench and follow the manufacturer’s torque values. If no value is provided, tighten incrementally and check face flatness and axial dimension as you go. Over-torque can compress elastomers excessively and create leakage paths; under-torque risks movement and misalignment during operation.
8) Final checks and slow-roll test
After installation, rotate the shaft manually or with controlled slow roll to confirm free rotation and absence of rubbing or binding. Re-check runout and seal face parallelism if possible. Leak-test the seal at low pressure (hydro or pneumatic per procedure) to ensure seals seat correctly without running the equipment at full operating speed or pressure initially.
Testing, commissioning and first-run monitoring for mechanical seal reliability
Commissioning should be staged: low-speed/no-pressure checks, low-pressure slow-speed run, and then ramp to operating conditions while monitoring temperature, vibration and leakage. Record baseline values for face temperatures and leakage rate. During the first 24–72 hours of operation, monitor seals closely for changes in leakage, temperature spikes or vibration. Early anomalous signs usually indicate installation errors or incompatibility that should be addressed while the equipment can be safely stopped.
What to record during commissioning
Log shaft speed, pressure, seal chamber temperature, seal leakage (mL/hour or drops/minute), and vibration levels. These baselines help detect drift and schedule preventative maintenance. If seal leakage increases steadily, inspect for face wear, elastomer extrusion, or external shaft movement.
Common installation mistakes and how to avoid them
Understanding common errors helps prevention. Key mistakes include: installing seals in a contaminated environment; touching lapped faces with fingers; incorrect spring orientation; using wrong lubricants; over- or under-tightening gland bolts; failing to repair or replace a grooved or corroded shaft sleeve; skipping slow-roll and leakage checks. Standardize installation procedures, use checklists and train technicians to reduce variation and error.
Failure modes often traced to installation
Typical failure modes related to installation: face damage from particulate contamination, elastomer extrusion from excessive compression, thermal damage from dry-running during startup, and misalignment due to uneven gland tightening. Each of these can be prevented with careful preparation and adherence to manufacturer instructions.
Material and seal type selection—quick comparison for specification
Choosing the correct mechanical seal materials and type is a commercial and technical decision tied to cost, longevity, and process compatibility. The table below summarizes common elastomers and PTFE/filled PTFE materials and their properties for quick reference.
| Material | Key Properties | Typical Applications |
|---|---|---|
| NBR (Nitrile) | Good oil resistance, moderate temp (-40 to 120°C) | Hydraulic oil seals, general industrial fluids |
| FKM (Viton) | Excellent chemical and high-temp resistance (up to ~200°C) | Petrochemical, high-temp seals |
| EPDM | Good steam/alkaline/water resistance, poor oil resistance | Water and steam seals |
| Silicone | Wide temp range, good compression set resistance, poor fuel resistance | Food, medical, cold temperature applications |
| FFKM | Highest chemical resistance, excellent temp range, High Quality cost | Chemical processing, extreme environments |
| PTFE (filled types) | Low friction, wide chemical resistance, can be filled for wear resistance | Shaft seals, reciprocating/pumping applications |
Sources for material properties: MatWeb material data and manufacturer datasheets. Material-specific selection must consider fluid compatibility charts and temperature/pressure limits supplied by the seal manufacturer.
Choosing between seal types: quick trade-offs
Single seals are simpler and cost-effective for lower-risk applications. Double seals (pressurized or unpressurized) provide extra protection for hazardous or toxic fluids. Cartridge seals simplify installation and reduce installation errors because they are pre-set and installed as an assembly. Selecting the correct type requires balancing process risk, maintenance capability, and total cost of ownership.
Polypac: Manufacturer profile and how our capabilities support better mechanical seal installations
Polypac is a scientific and technical hydraulic seal manufacturer and oil seal supplier specializing in seal production, sealing material development, and customized sealing solutions for special working conditions.
Polypac's custom rubber ring and O-ring factory covers an area of more than 10,000 square meters, with a factory space of 8,000 square meters. Our production and testing equipment are among the most advanced in the industry. As one of the largest companies in China dedicated to the production and development of seals, we maintain long-term communication and cooperation with numerous universities and research institutions both domestically and internationally.
Founded in 2008, Polypac began by manufacturing filled PTFE seals, including bronze-filled PTFE, carbon-filled PTFE, graphite PTFE, MoS₂-filled PTFE, and glass-filled PTFE. Today, we have expanded our product line to include O-rings made from various materials such as NBR, FKM, silicone, EPDM, and FFKM.
How Polypac’s capabilities reduce installation risk
Polypac’s strengths align with best-practice mechanical seal installation needs: precise material development, strict production tolerances, and advanced testing. These capabilities mean seals arrive with consistent dimensions, low face runout and predictable elastomer compression characteristics — reducing the need for on-site improvisation and lowering the risk of installation-related failures. Long-term cooperation with research institutions also helps Polypac implement material upgrades that increase seal life in aggressive environments.
Core product lines and competitive advantages
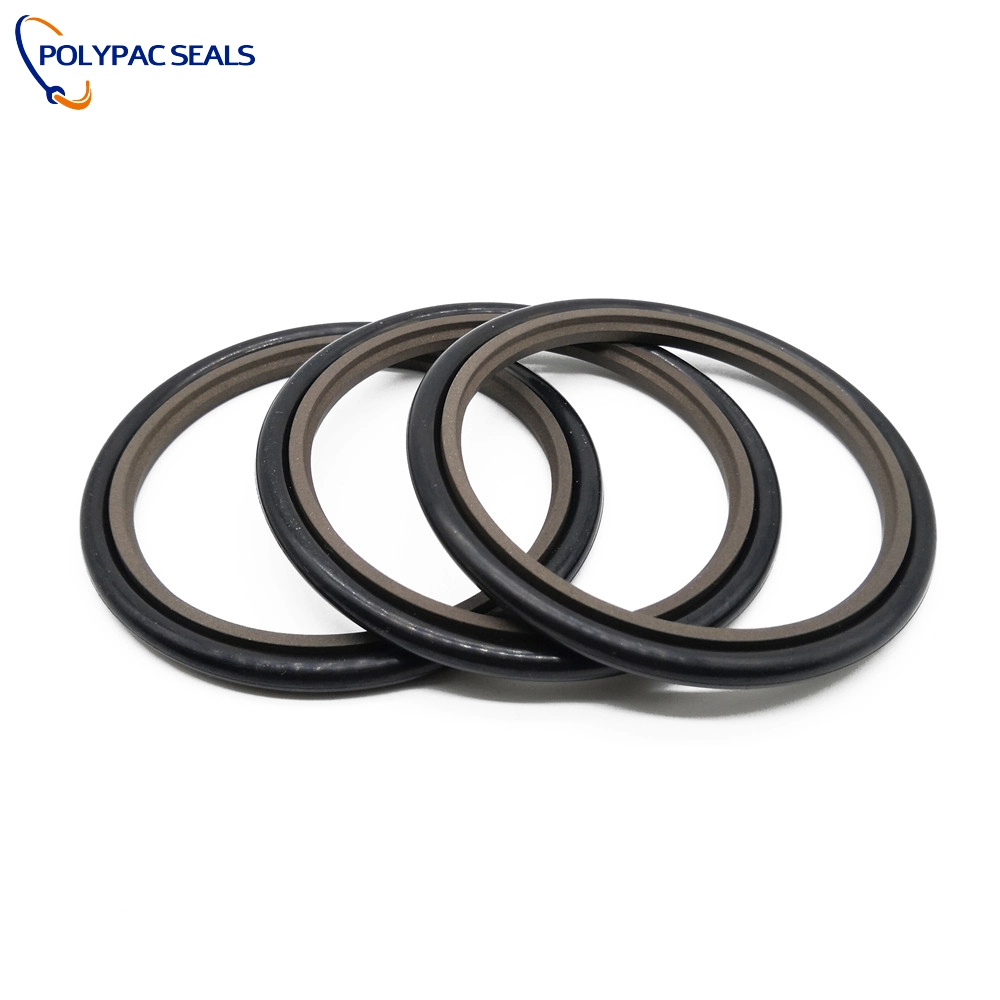
Polypac’s main products include O-Rings, Rod Seals, Piston Seals, End Face Spring Seals, Scraper Seals, Rotary Seals, Back-up Rings, and Dust Rings. Core competitive advantages are:
- Advanced filled-PTFE manufacturing (bronze, carbon, MoS₂, graphite, glass) for durable low-friction faces.
- Broad elastomer portfolio (NBR, FKM, EPDM, silicone, FFKM) suited to diverse fluids and temperatures.
- Large-scale, modern production and testing equipment that ensures batch consistency.
- Customization capability to adapt seals to special working conditions or legacy equipment.
Troubleshooting common post-install issues and corrective actions
When a newly installed mechanical seal shows issues, quickly diagnose to prevent escalation. Typical symptoms, likely causes, and corrective actions:
- Leakage at startup — likely caused by insufficient axial compression, contaminated faces, or incorrect O-ring seating. Action: stop, verify face seating and clean faces; re-seat gland bolts in correct pattern; replace damaged O-rings.
- High face temperature — may indicate dry-running or inadequate lubrication film. Action: verify barrier/lubrication fluid supply, confirm correct orientation of faces, and check for excessive speed/pressure beyond seal rating.
- Vibration-induced leakage — could be misalignment or high shaft runout. Action: measure runout, correct coupling alignment, or replace shaft sleeve as needed.
Maintenance intervals and best-practice monitoring
Predictive maintenance is the most cost-effective strategy. Monitor seal leakage, face temperatures and vibration as part of routine inspections. Replace consumables (O-rings and backup rings) during planned overhauls. Maintain a spare-parts inventory of commonly used seal sizes and elastomer types to minimize downtime while ensuring OEM-specified parts are used.
FAQ — Mechanical seal installation
Q: How tight should gland bolts be when installing a mechanical seal?
A: Follow the seal and equipment manufacturer torque values. If not available, tighten bolts incrementally in a star pattern until components are snug and axial setting dimensions match specification. Use a calibrated torque wrench and avoid over-torquing which can distort the seat.
Q: Can I reuse the old seal parts?
A: Reuse is not recommended for face components, O-rings or backup rings. Metallic retainers might be reusable if undamaged and within tolerance, but replacement of wear items is best practice to ensure reliability.
Q: What is the best lubricant to use during assembly?
A: Use only manufacturer-approved assembly grease compatible with seal elastomer and process fluid. For food or pharmaceutical applications use food-grade lubricants per applicable regulations.
Q: How do I know if a seal is single or balanced?
A: Balanced seals have a stepped or reduced pressure area for the rotating face and are often specified for high-pressure applications. The seal datasheet or model number typically indicates whether it’s balanced.
Q: How long should I run leak tests before declaring installation successful?
A: Perform staged testing: static/leak test after installation, then low-speed low-pressure run for several minutes, then ramp to full operating conditions while monitoring. Maintain close observation for at least 24–72 hours to establish stability.
Contact Polypac / View products
If you need custom mechanical seal solutions, replacement parts, or technical support for seal selection and installation, contact Polypac’s technical team for application review and product recommendations. View our product catalog for O-Rings, Rod Seals, Piston Seals, End Face Spring Seals, Scraper Seals, Rotary Seals, Back-up Rings and Dust Rings. For prompt assistance, reach out via our sales channel or request a quotation to ensure you get the right mechanical seal for your equipment.
References
- API 682: Mechanical Seals for Pumps — industry standard guidance on seal selection and application.
- SKF Mechanical Seal and Packing Guidelines — manufacturer best practices for installation and testing.
- MatWeb Material Property Data — standard references for elastomers and PTFE materials.
- Polypac internal product and material literature (company datasheets and testing documents).

O-Ring Kits: The Essential Tool for Efficient Maintenance & Repair | Polypac

FKM: The Complete Guide to High-Temperature & Chemical-Resistant Sealing | Polypac

The Ultimate Guide to Rod Seals: Types, Selection, Failures, & Future Trends in 2026

NBR (Nitrile): The Complete Guide to the Universal Sealing Elastomer | Polypac

Ram Cylinder Seals: Engineered for Single-Acting Force & Reliability | Polypac
Products
What does "AS568" mean?
What is the difference between a static seal and a dynamic seal?
Can I reuse a seal?
When should I use a spring-energized seal instead of a standard elastomeric seal?
What is the purpose of the metal spring in a rotary shaft seal?
Stay Updated with Industry Insights
Subscribe to our articles and receive the latest news, expert guidance, and technical updates directly in your E-mail.
Rest assured that your privacy is important to us, and all information provided will be handled with the utmost confidentiality.

Polypac is a trusted global supplier of high-performance sealing solutions, providing OEM & ODM services for industries worldwide.
E-mail:
Phone/WhatsApp:
© 2025 Polypac Seals. All Rights Reserved.
dms
DMS
DMS